The Best Way to Upgrade Your Computer
Upgrade your hardware to increase performance.
 (Image credit: Shutterstock)
An outdated PC can be given new life through an upgrade, which will also improve overall processing performance and storage capacity. This tutorial will walk you through the necessary upgrades you might think about, whether your goals are to acquire higher graphics performance for gaming or creative work, store more data, or speed up your programs.
STEPS FOR HOW TO UPGRADE YOUR PCThere are five primary ways to update your computer:
- RAM Upgrade
- Switching from M.2/NVMe Solid State Drive to Hard Disk
- Switching from a SATA Solid-State Drive to a Hard Disk
- Changing the Graphics Card
- Upgrading the Processor
Should you purchase a new computer or upgrade your current one?
You can customize your PC to fit your unique requirements and tastes by upgrading. Depending on what kind of performance enhancements—better gaming, faster software, more storage—are most important to you, you can rank which components should be upgraded first.
However, consider whether purchasing a new computer would be a better option before starting to modify the hardware on your present one.
There are five primary ways to update your computer:
- RAM Upgrade
- Switching from M.2/NVMe Solid State Drive to Hard Disk
- Switching from a SATA Solid-State Drive to a Hard Disk
- Changing the Graphics Card
- Upgrading the Processor
Should you purchase a new computer or upgrade your current one?
You can customize your PC to fit your unique requirements and tastes by upgrading. Depending on what kind of performance enhancements—better gaming, faster software, more storage—are most important to you, you can rank which components should be upgraded first.
However, consider whether purchasing a new computer would be a better option before starting to modify the hardware on your present one.
If your computer isn't too old—less than three years—you might be able to extend its usable life with improvements at a fraction of the price of a brand-new machine. If it's much older, though, it might not be worth the expense because it can be harder to find suitable parts.
The overall cost of upgrades may occasionally equal or even surpass the cost of a brand-new, functional PC. Think about the total cost of replacing a system versus upgrading several components.
In the end, deciding between updating and purchasing a new PC comes down to weighing the cost-effectiveness, determining your performance requirements, and figuring out how long an upgrade will last compared to a new machine. Upgrades may be a smart decision if they meet your needs and provide a fair return on investment.
STEP BY STEP GUIDE
1. RAM Upgrading
Random Access Memory (RAM) can be increased to greatly increase a system's responsiveness, particularly if you utilize memory-intensive programs or run numerous apps at once.
Random Access Memory (RAM) can be increased to greatly increase a system's responsiveness, particularly if you utilize memory-intensive programs or run numerous apps at once.
2. Switching From M.2/NVMe Solid State Drive To Hard Disk
 (Image: © istockphoto.com)
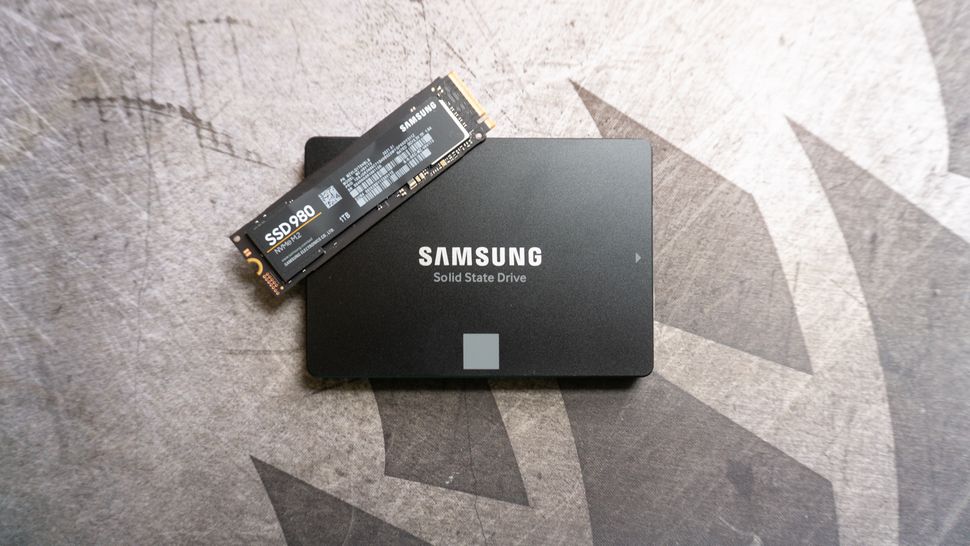
A SSD can provide a noticeable increase in performance when replacing an HDD. The two most common choices are SATA SSDs and M.2/NVMe SSDs. In this phase, we'll upgrade to an M.2/NVMe SSD; in phase 3, we'll upgrade to a SATA SSD.
(Image: © istockphoto.com)
A SSD can provide a noticeable increase in performance when replacing an HDD. The two most common choices are SATA SSDs and M.2/NVMe SSDs. In this phase, we'll upgrade to an M.2/NVMe SSD; in phase 3, we'll upgrade to a SATA SSD.
PCIe (Peripheral Component Interconnect express) and U.2 SSDs are two more types of SSDs.
It's important to consider your system's compatibility, performance requirements, and financial constraints when selecting an SSD. To guarantee a seamless update procedure, always double-check compatibility with your motherboard and system specs.
In order to convert from a hard drive to an M.2/NVMe SSD, you must:
1. Verify that the M.2 slot on your motherboard can accommodate NVMe SSDs. To verify compatibility, take note of the length and breadth that your motherboard supports.
2. To move your operating system, apps, and files from the HDD to the M.2/NVMe SSD, use cloning software. If your arrangement prevents you from connecting the M.2/NVMe SSD directly to your motherboard alongside the HDD, you might need to use an external adapter to clone to the SSD.
3. Turn off and turn on your computer. Look for your motherboard's M.2 slot. Delete any installed modules if required. At a little inclination of around 30 degrees, place the M.2/NVMe SSD into the slot and gently press it in. Use the included screw to firmly fasten the SSD.
4. After turning on your computer, make sure the M.2/NVMe SSD is set as the primary boot device by accessing the BIOS. Your system ought to boot from the M.2/NVMe SSD after you save your settings and exit the BIOS, prepared to provide optimal performance.
1. Verify that the M.2 slot on your motherboard can accommodate NVMe SSDs. To verify compatibility, take note of the length and breadth that your motherboard supports. 2. To move your operating system, apps, and files from the HDD to the M.2/NVMe SSD, use cloning software. If your arrangement prevents you from connecting the M.2/NVMe SSD directly to your motherboard alongside the HDD, you might need to use an external adapter to clone to the SSD.
3. Turn off and turn on your computer. Look for your motherboard's M.2 slot. Delete any installed modules if required. At a little inclination of around 30 degrees, place the M.2/NVMe SSD into the slot and gently press it in. Use the included screw to firmly fasten the SSD. 4. After turning on your computer, make sure the M.2/NVMe SSD is set as the primary boot device by accessing the BIOS. Your system ought to boot from the M.2/NVMe SSD after you save your settings and exit the BIOS, prepared to provide optimal performance.
3. Switching From A SATA Solid-State Drive To A Hard Disk
 (Image: © Future)
Even though they are slower than M.2/NVMe SSDs, SATA SSDs can nevertheless perform better than a hard drive. In addition to being compatible with the majority of computers, they are typically less expensive than solid-state drives and large enough to meet most common computing requirements, including web browsing, office programs, and video viewing.
The steps listed below can be used to convert a hard drive to a SATA SSD.
1. Verify that the SSD is compatible with the SATA interface on your motherboard. Verify the SSD's dimensions (2.5 inches is the industry standard) and make sure your system has a free SATA port.
2. Transfer your data, apps, and operating system to the SATA SSD using cloning software. This can be accomplished by utilizing a USB to SATA adapter to connect the SSD to your PC. This is particularly helpful for laptops and PCs without additional internal drive bays.
3. Shut down your computer, take out the casing, and find your HDD. Using the same SATA and power cords, put the SATA SSD in its place after disconnecting and removing the HDD. Put the SSD in the drive bay securely.
4. Turn on your computer, then check that the SATA SSD is selected as the primary boot device by going into the BIOS. Exit BIOS after saving your changes. The SATA SSD should now be used to boot your PC, greatly enhancing performance.
4. Changing The Graphics Card

(Image: © unsplash.com)
(Image: © Future)Even though they are slower than M.2/NVMe SSDs, SATA SSDs can nevertheless perform better than a hard drive. In addition to being compatible with the majority of computers, they are typically less expensive than solid-state drives and large enough to meet most common computing requirements, including web browsing, office programs, and video viewing.
The steps listed below can be used to convert a hard drive to a SATA SSD.
1. Verify that the SSD is compatible with the SATA interface on your motherboard. Verify the SSD's dimensions (2.5 inches is the industry standard) and make sure your system has a free SATA port.
2. Transfer your data, apps, and operating system to the SATA SSD using cloning software. This can be accomplished by utilizing a USB to SATA adapter to connect the SSD to your PC. This is particularly helpful for laptops and PCs without additional internal drive bays.
3. Shut down your computer, take out the casing, and find your HDD. Using the same SATA and power cords, put the SATA SSD in its place after disconnecting and removing the HDD. Put the SSD in the drive bay securely.
4. Turn on your computer, then check that the SATA SSD is selected as the primary boot device by going into the BIOS. Exit BIOS after saving your changes. The SATA SSD should now be used to boot your PC, greatly enhancing performance.
4. Changing The Graphics Card
(Image: © unsplash.com)
Your PC's gaming performance, support for multiple monitors, and overall visual performance in graphically demanding apps can all be greatly improved with a new graphics card.
3. Slide the replacement graphics card into the PCIe slot, tighten the screws, and attach any required power cables. Shut off the device, turn on your computer, and install the updated drivers.
1. Verify that there is adequate physical room in your case and that your PC's power supply can support the additional power needed for the new graphics card.
2. Turn off and disconnect your computer. Locate the graphics card by opening the case, taking out the screws and any power connectors, and then carefully removing it from the slot.
5. Upgrading The Processor
 (Image: © MSI)
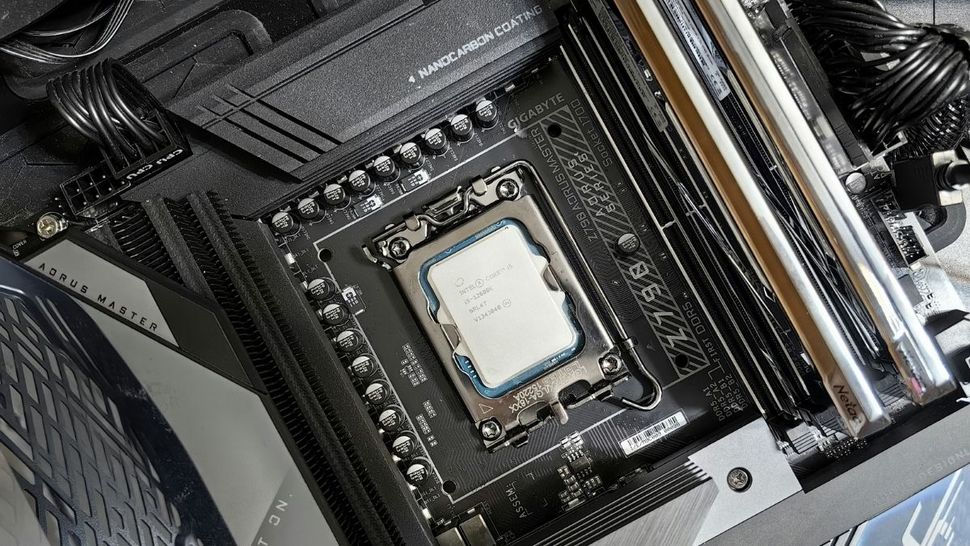
Compared to the previous methods we have discussed here, upgrading the CPU is a less common approach. This is due to the complicated and costly nature of the update, as well as the strict motherboard compatibility requirements.
Only when the existing processor is clearly the bottleneck or if a major system revamp is planned are CPU upgrades usually taken into consideration.
To update your CPU, take the actions listed below.
Make sure your motherboard and new CPU are compatible. Inspect the chipset and CPU socket type, and confirm that the BIOS on your motherboard is current.
2. Turn off and disconnect your computer. To reach the motherboard, pry open the case. It could be necessary to take off additional parts or wires that obstruct the CPU socket.
3. Remove the fan and heatsink that make up the CPU cooler carefully from above the CPU. To release the cooler, you might need to loosen a retention arm or give it a slight twist. Next, release the retention arm on the socket and carefully remove the CPU out of it (no force should be needed).
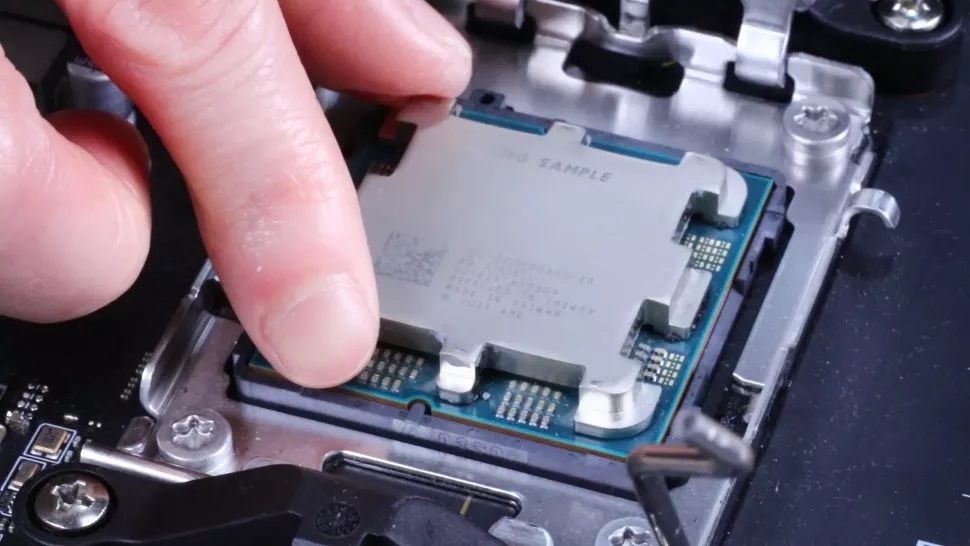
4. Insert the replacement CPU into the socket, making sure it fits correctly into the notches or markings (CPUs fit into sockets only in one way). Securing the retention arm of the socket will lock the CPU in place. If thermal paste is not already applied to the cooler, apply it to the top of the CPU. After that, make sure the CPU cooler is firmly attached by reattaching it.
5. Reassemble any parts or wires that you have to shift or take out in order to upgrade the CPU. After closing the PC case and re-plugging everything, turn on the computer. To make sure the new CPU is detected and to set up any new settings, you might need to access the BIOS.
HOW TO UPGRADE YOUR PC: OVERVIEW
We've gone over the main ways to update your computer. There are a few more choices, though, that you might want to think about.
It could be necessary to increase your power supply to accommodate the additional demands if you're installing components that need more power, such a powerful graphics card.
More potent parts have the capacity to produce more heat. To lower temperatures, think about replacing your cooling system with improved fans or a liquid cooling solution.
All things considered, upgrading your PC can increase its longevity and improve your computing experience at a reasonable cost. Before investing in new components, be sure they are compatible, whether you're upgrading for better graphics, more storage, or greater performance. Before making any changes, always make a backup of your data. If you're not comfortable doing the upgrades alone, get help from a specialist.
Your PC's gaming performance, support for multiple monitors, and overall visual performance in graphically demanding apps can all be greatly improved with a new graphics card.
3. Slide the replacement graphics card into the PCIe slot, tighten the screws, and attach any required power cables. Shut off the device, turn on your computer, and install the updated drivers.
1. Verify that there is adequate physical room in your case and that your PC's power supply can support the additional power needed for the new graphics card.
2. Turn off and disconnect your computer. Locate the graphics card by opening the case, taking out the screws and any power connectors, and then carefully removing it from the slot.
5. Upgrading The Processor
(Image: © MSI)
Compared to the previous methods we have discussed here, upgrading the CPU is a less common approach. This is due to the complicated and costly nature of the update, as well as the strict motherboard compatibility requirements.
Only when the existing processor is clearly the bottleneck or if a major system revamp is planned are CPU upgrades usually taken into consideration.
To update your CPU, take the actions listed below.
Make sure your motherboard and new CPU are compatible. Inspect the chipset and CPU socket type, and confirm that the BIOS on your motherboard is current.
2. Turn off and disconnect your computer. To reach the motherboard, pry open the case. It could be necessary to take off additional parts or wires that obstruct the CPU socket.
3. Remove the fan and heatsink that make up the CPU cooler carefully from above the CPU. To release the cooler, you might need to loosen a retention arm or give it a slight twist. Next, release the retention arm on the socket and carefully remove the CPU out of it (no force should be needed).
4. Insert the replacement CPU into the socket, making sure it fits correctly into the notches or markings (CPUs fit into sockets only in one way). Securing the retention arm of the socket will lock the CPU in place. If thermal paste is not already applied to the cooler, apply it to the top of the CPU. After that, make sure the CPU cooler is firmly attached by reattaching it.
5. Reassemble any parts or wires that you have to shift or take out in order to upgrade the CPU. After closing the PC case and re-plugging everything, turn on the computer. To make sure the new CPU is detected and to set up any new settings, you might need to access the BIOS.
HOW TO UPGRADE YOUR PC: OVERVIEW
We've gone over the main ways to update your computer. There are a few more choices, though, that you might want to think about.
It could be necessary to increase your power supply to accommodate the additional demands if you're installing components that need more power, such a powerful graphics card.
More potent parts have the capacity to produce more heat. To lower temperatures, think about replacing your cooling system with improved fans or a liquid cooling solution.
All things considered, upgrading your PC can increase its longevity and improve your computing experience at a reasonable cost. Before investing in new components, be sure they are compatible, whether you're upgrading for better graphics, more storage, or greater performance. Before making any changes, always make a backup of your data. If you're not comfortable doing the upgrades alone, get help from a specialist.


Comments
Post a Comment